
Mastering your KitchenAid ice cream bowl is the ultimate way to elevate your home dessert game. By prioritizing a deep freeze and cold ingredients, you can easily create professional-grade ice cream, sorbet, and gelato right in your own kitchen.
There is nothing quite like the taste of homemade ice cream on a warm summer evening. In 2026, as we embrace more home-cooking trends, the KitchenAid ice cream bowl has become a staple for many households. Whether you are a fan of classic vanilla or experimental flavors like spicy chocolate or lavender honey, this simple attachment turns your stand mixer into a powerhouse of frozen treats.
If you have been intimidated by the process or if you have struggled with liquid soups instead of creamy scoops, you are not alone. Learning how to use KitchenAid ice cream bowl equipment effectively is a skill that anyone can master. With a few simple steps and some insider tricks, you will be making artisanal desserts that rival your local scoop shop.
Key Takeaways
- Freeze it thoroughly: The bowl must be frozen for at least 24 hours to ensure your ice cream actually thickens.
- Keep ingredients cold: Chill your ice cream base in the refrigerator for several hours before pouring it into the bowl.
- Start the mixer first: Always have the dasher spinning before you add the liquid mixture to prevent it from freezing instantly to the sides.
- Don’t overfill: Leave enough space at the top of the bowl to allow for the expansion of the mixture as it churns and aerates.
- Patience is key: Do not rush the process; let it churn until it reaches a soft-serve consistency before transferring it to the freezer.
Understanding the Mechanics of the Bowl
The KitchenAid ice cream bowl is not just a standard mixing bowl; it is a specialized piece of equipment with double walls filled with a unique freezing liquid. This liquid acts as a thermal battery, holding the deep cold required to transform your liquid base into a solid treat. When you learn how to use KitchenAid ice cream bowl tools, you are essentially learning how to manage temperature physics.
The Importance of the Freezer
The most common mistake beginners make is not freezing the bowl long enough. While the manual might suggest 15 hours, I recommend a full 24 hours. Your freezer needs to be set to its coldest setting for the best results. If the bowl is not solid-frozen throughout, the liquid inside will warm up too quickly during the churning process, resulting in a slushy texture rather than a creamy one.
The Role of the Dasher
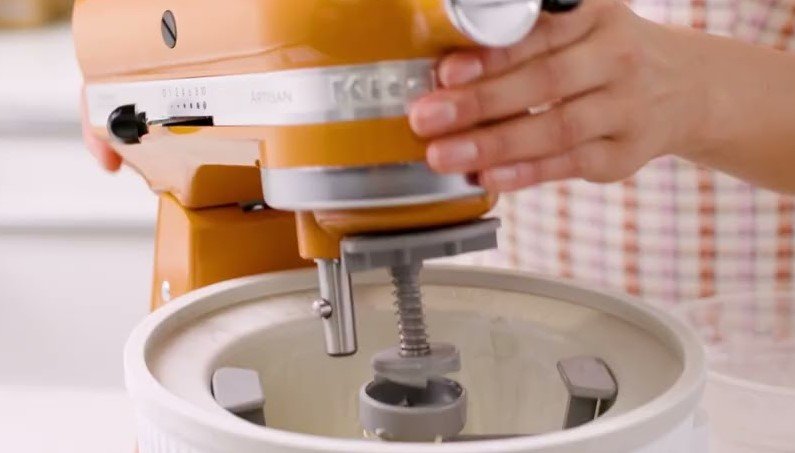
The dasher is the white plastic piece that fits inside the bowl. Its job is to scrape the sides of the frozen bowl constantly. This scraping is vital because it prevents large ice crystals from forming. If you don’t use the dasher properly, your dessert will be crunchy and icy. Always make sure the dasher is securely attached to the drive assembly before you begin.
Preparing Your Ice Cream Base
The quality of your ice cream starts long before the machine is turned on. Your base—often a mixture of cream, milk, sugar, and flavorings—needs to be handled with care. Knowing how to use KitchenAid ice cream bowl systems effectively includes mastering the art of the pre-chill.
Visual guide about How to Use Kitchen Aid Ice Cream Bowl
Image source: images.ctfassets.net
The Value of Pre-Chilling
Never pour warm or room-temperature liquid into your frozen bowl. If you do, you will instantly use up all the “cold energy” stored in the bowl. Aim to keep your base in the refrigerator until the very last second. A cold base churns faster and produces a much creamier final product because it spends less time in the machine.
Balancing Your Ingredients
Sugar and fat are the secret weapons of ice cream. Fat provides that luxurious mouthfeel, while sugar prevents the ice cream from turning into a solid block of ice. If you are experimenting with your own recipes, don’t skimp on the sugar. It serves a functional purpose beyond just sweetness!
Step-by-Step Churning Process
Once you have a frozen bowl and a chilled base, you are ready to assemble. The sequence of events matters significantly. If you rush this part, you might end up with a jammed machine or a frozen mess.
Assembling the Attachment
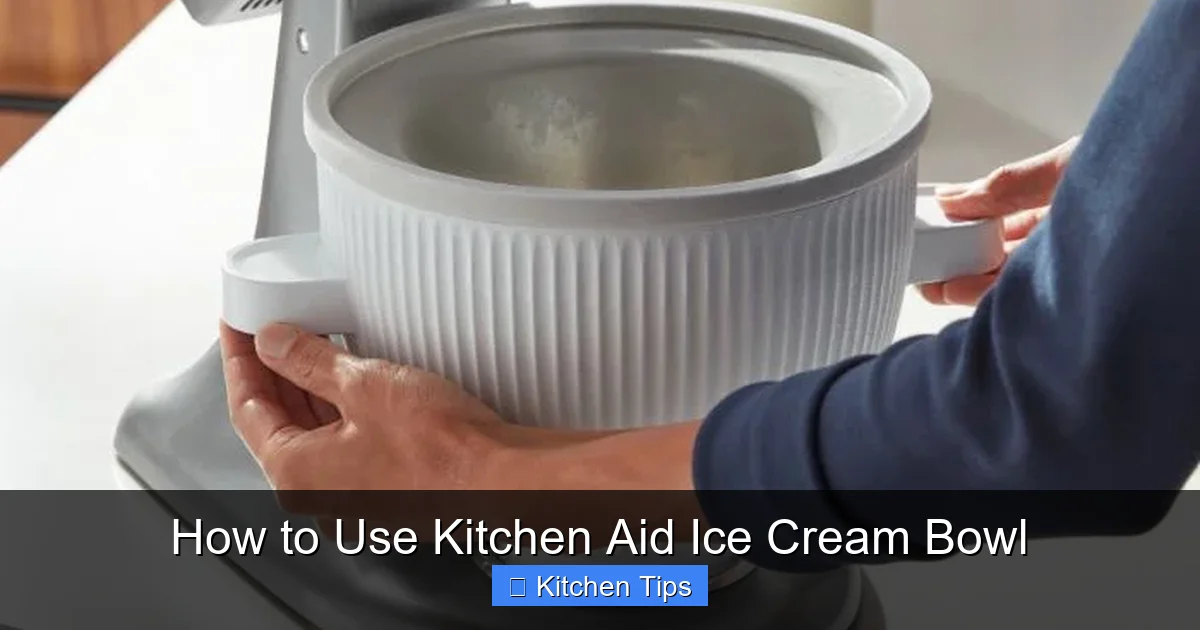
First, place the freezer bowl onto your stand mixer base. Then, insert the dasher. It should sit comfortably in the center. Once the parts are in place, lower the mixer head. You must turn the mixer to the lowest speed setting before adding any liquid. If you pour the base in while the mixer is off, the mixture will instantly freeze to the walls, potentially preventing the dasher from turning.
Adding the Mix-ins
Are you a fan of cookie dough or chocolate chips? The best time to add these is during the last two minutes of the churning process. If you add them too early, they might get pulverized by the dasher. By waiting until the ice cream is nearly set, you ensure that every scoop has a nice, chunky texture.
Troubleshooting Common Issues
Even with the best instructions, things can sometimes go wrong. If you are wondering how to use KitchenAid ice cream bowl components when the process doesn’t go as planned, here are some quick solutions to common problems.
My Ice Cream Is Still Liquid
This usually happens because the bowl was not frozen long enough or the base was too warm. If you find your ice cream isn’t setting after 20 minutes, stop the mixer. Place the bowl and the liquid back into the freezer for an hour, then try again. Sometimes, a “double-churn” process saves a batch that started out too warm.
The Machine Is Making a Clicking Sound
That clicking sound is usually the spring-loaded mechanism in the drive assembly. It happens when the ice cream has become so thick that the dasher is struggling to move. This is actually a good sign! It means your ice cream is almost done. If it continues for more than a few seconds, turn off the machine and transfer your creation to a storage container.
Storage and Cleaning Tips
Once your ice cream is churned to a soft-serve consistency, it is technically ready to eat. However, most people prefer a firmer texture. To achieve this, you need to “ripen” the ice cream in the freezer.
Hardening Your Ice Cream
Transfer the soft mixture into an airtight container. Press a piece of parchment paper directly onto the surface of the ice cream to prevent ice crystals from forming. Place it in the back of your freezer—the coldest part—for at least four hours. This will give you that perfect, scoopable consistency you crave.
Cleaning Your Equipment
Cleaning is straightforward, but you must never use a dishwasher for the freezer bowl. The high heat can damage the internal cooling liquid. Wash the bowl by hand using warm water and a mild soap once it has returned to room temperature. Be sure to dry it completely before putting it back into the freezer for your next session.
Creative Recipes to Get You Started
Now that you know how to use KitchenAid ice cream bowl equipment, it is time to have some fun. Start with a classic vanilla bean custard base. It is the perfect canvas for almost any flavor. Once you feel comfortable with that, try adding fresh fruit purees like strawberry or peach.
If you want something more indulgent, try a coffee-toffee crunch. Simply steep coffee grounds in your cream before mixing. The possibilities are endless when you have the right tools. Keep a notebook of your favorite combinations, and don’t be afraid to adjust the ratios of cream to milk to suit your personal preference for richness.
In conclusion, the key to success is preparation and temperature control. By treating your bowl with care and keeping your ingredients cold, you can produce professional results with ease. Enjoy the process of creating delicious memories in your kitchen all year round.
Frequently Asked Questions
How long should I freeze the bowl?
You should freeze the bowl for at least 24 hours to ensure it is cold enough to churn properly. For the best results, keep the bowl in the very back of your freezer where the temperature is most consistent.
Can I wash the freezer bowl in the dishwasher?
No, you should never put the freezer bowl in the dishwasher. Hand wash it with warm, soapy water only after it has reached room temperature to avoid damaging the internal freezing mechanism.
Why is my ice cream still soft after churning?
Your mixture may be soft because the ingredients were not chilled enough before churning, or the bowl was not frozen long enough. Simply transfer the mixture to an airtight container and place it in your freezer for a few hours to firm up.
Can I make sorbet in the KitchenAid ice cream bowl?
Absolutely! You can make sorbet, sherbet, and even frozen yogurt using this attachment. The process is identical to making dairy-based ice cream, just ensure your fruit-based mixture is well-chilled.
What if the dasher gets stuck?
If the dasher stops moving, it means the ice cream is frozen solid and is ready to be transferred. Turn off the mixer immediately, remove the dasher, and scoop the ice cream into a container for final hardening in the freezer.
Should the mixer be running before I add the base?
Yes, always start the mixer on the lowest speed before pouring in your ice cream base. This prevents the mixture from freezing instantly against the walls of the bowl, which could stall the motor.