
Mastering the art of frozen treats is simple once you know how to use the KitchenAid ice cream maker effectively. By prioritizing bowl temperature, ingredient chilling, and proper mixing speeds, you can achieve professional, creamy textures right in your own home kitchen. Follow these essential steps to elevate your dessert game today.
There is nothing quite like the taste of homemade ice cream on a warm afternoon. If you own a stand mixer, you already have one of the best tools for the job. Learning how to use the KitchenAid ice cream maker is a game changer for anyone who loves high-quality, customized desserts. By turning your standard mixer into a churning machine, you can create everything from classic vanilla bean to complex, gourmet flavors that aren’t available in stores.
As we head further into 2026, home culinary technology has made it easier than ever to achieve artisan results. However, even with the best equipment, there is a specific process you need to follow. If you have ever wondered why your ice cream turned out icy or failed to freeze, it usually comes down to preparation. This guide will walk you through everything you need to know to achieve that perfect, scoopable consistency every single time.
Key Takeaways
- Freeze the Bowl Properly: The freezer bowl must be frozen for at least 24 hours at the lowest temperature to ensure the base churns correctly.
- Chill Your Mixture: Always pre-chill your ice cream base in the refrigerator before adding it to the machine to speed up the process and improve texture.
- Don’t Overfill: Only fill the bowl to the recommended line to prevent overflow and ensure the dasher can move freely.
- Use the Correct Speed: Always operate your stand mixer on the lowest speed setting to maintain the ideal churning rate.
- Add Mix-ins Late: Wait until the final two minutes of churning to add ingredients like nuts, chocolate chips, or fruit chunks.
- Consistency is Key: Soft-serve consistency is normal right out of the machine; always transfer to a freezer-safe container for firming up.
Understanding Your Equipment
The KitchenAid ice cream maker attachment is a unique piece of gear. Unlike standalone machines, it relies on your stand mixer’s motor for power and a specialized freezer bowl for cold production. The heart of the system is the bowl itself, which contains a special liquid that absorbs heat.
Why the Freezer Bowl Matters
The biggest mistake most people make is not freezing the bowl long enough. The bowl needs to be rock solid to draw the heat out of your cream mixture. If the liquid inside the bowl isn’t completely frozen, the mixture will just sit there and get messy. In 2026, most modern freezers have specific temperature settings. Set yours to the coldest possible point at least 24 hours before you plan to churn. If you can shake the bowl and hear liquid moving inside, it is not ready yet.
The Role of the Dasher
The dasher is the rotating piece inside the bowl. It is designed to scrape the sides of the bowl constantly, moving the freezing ice cream into the center. Never try to operate the machine without the dasher correctly attached to the drive assembly. If the dasher isn’t moving, your ice cream will freeze into a solid brick against the walls of the bowl rather than becoming a smooth, creamy dessert.
Preparing Your Ice Cream Base
How to use the KitchenAid ice cream maker effectively begins long before you turn the mixer on. The quality of your base dictates the quality of your finished dessert. Whether you prefer a rich, egg-based custard or a quick Philadelphia-style cream base, the secret lies in the temperature.
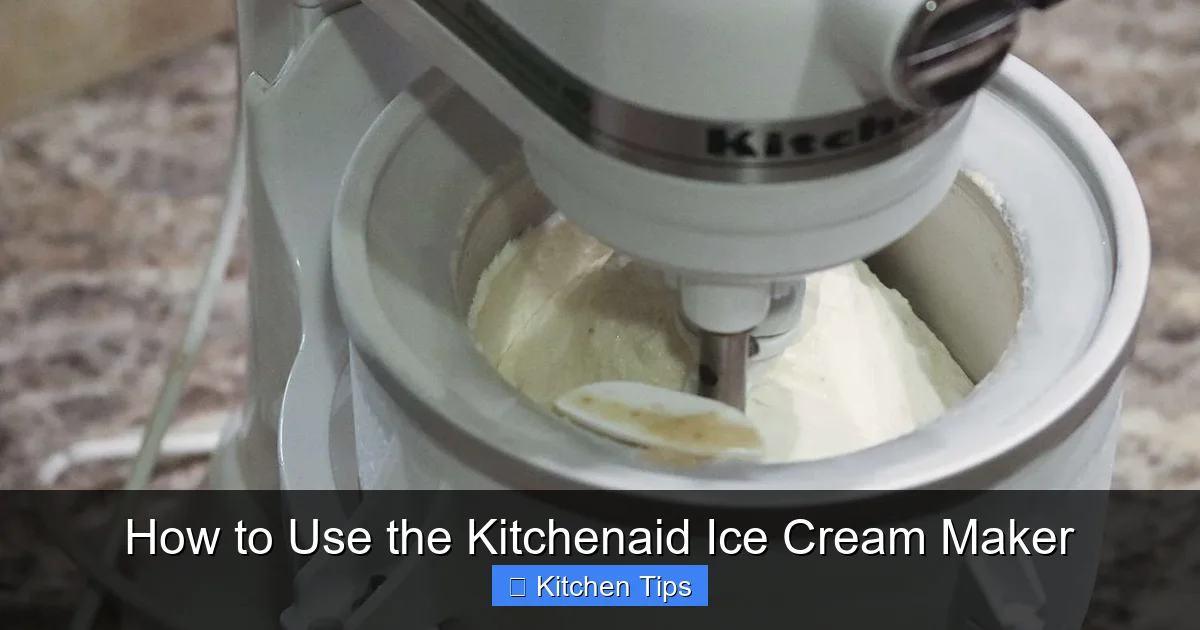
Visual guide about How to Use the Kitchenaid Ice Cream Maker
Image source: storables.com
The Importance of Chilling
Never pour a warm or even room-temperature mixture into your cold bowl. If you do, you warm up the bowl instantly, and your ice cream will never reach the right texture. After making your base, let it sit in the refrigerator for at least three to four hours, or even overnight. A colder base means a faster churn time and smaller ice crystals, which leads to a much smoother mouthfeel.
Balancing Your Ingredients
Fat and sugar are the two pillars of ice cream. Fat provides that luxurious, coating-the-mouth feel, while sugar lowers the freezing point, preventing your ice cream from turning into a block of ice. If you are experimenting with your own recipes, don’t skimp on the cream. Using high-quality ingredients in your base will always result in a better final product.
Step-by-Step Churning Process
Once your bowl is frozen and your base is chilled, you are ready to start the magic. The actual process of learning how to use the KitchenAid ice cream maker is quick if you follow the correct sequence of events.
Assembly Sequence
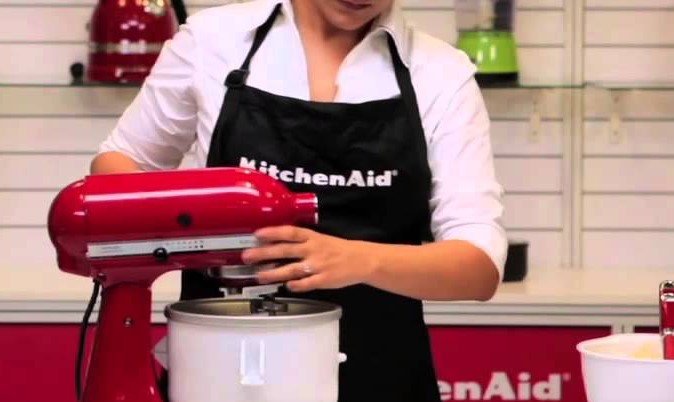
First, take the freezer bowl out of the freezer only when you are ready to use it. Place the drive assembly onto the mixer head, then slide the freezer bowl into place. Immediately insert the dasher and lower the mixer head. It is vital to have the mixer running on the lowest speed before you pour your base in. Starting the mixer first prevents the mixture from freezing instantly to the dasher and potentially stalling the motor.
Monitoring the Texture
Keep a close watch as the machine churns. Usually, 15 to 20 minutes is the sweet spot. You will know it is done when the mixture looks like thick, soft-serve ice cream. Do not be tempted to let it churn for too long. If you run it past the soft-serve stage, the ice cream may start to melt from the friction of the dasher, which ruins the texture you worked so hard to build.
Adding Mix-ins and Flavors
Part of the joy of knowing how to use the KitchenAid ice cream maker is being able to customize your batch. Whether you want to add brownie bits, fresh strawberries, or swirls of caramel, timing is everything.
When to Add Ingredients
Never add your mix-ins at the beginning. If you add them early, they will simply sink to the bottom or get pulverized by the dasher. Wait until the final two minutes of the churning cycle. This allows the ice cream to be firm enough to suspend the ingredients throughout the mixture evenly.
Tips for Success
Ensure your mix-ins are cold before adding them. If you add room-temperature chocolate chips, they can create little pools of warmth in the ice cream, leading to uneven freezing. Furthermore, keep your chunks relatively small. Large pieces can cause the dasher to jam or make the ice cream difficult to scoop later.
Storage and Post-Churn Care
Your work isn’t done just because the churning has finished. The transition from the bowl to the freezer is crucial for texture.
Transferring to Containers
The ice cream fresh out of the bowl will have the consistency of soft-serve. To get that store-bought firm texture, you need to “ripen” it. Transfer your mixture into a shallow, airtight container. Press a piece of parchment paper directly against the surface of the ice cream to prevent ice crystals from forming on top. Place it in your freezer for at least four hours to harden.
Cleaning and Maintenance
After you have transferred the ice cream, let the freezer bowl come to room temperature before you wash it. Never use hot water on a frozen bowl, as the rapid temperature change can cause damage to the plastic housing. Use lukewarm, soapy water and a soft cloth. Never put the freezer bowl in the dishwasher, as the high heat will destroy the internal cooling liquid.
Troubleshooting Common Problems
Even with the best instructions on how to use the KitchenAid ice cream maker, you might run into minor hurdles. Don’t worry; most of these are easy to fix.
The “My Ice Cream Didn’t Freeze” Dilemma
This is almost always caused by a bowl that wasn’t frozen long enough. If your kitchen is particularly warm, the bowl will lose its chill faster. If you live in a warm climate, try to perform your churning in an air-conditioned room to help the machine work more efficiently.
Noise and Stalling Issues
If your mixer makes a grinding noise or the dasher stops spinning, you likely have too much mixture in the bowl or the mixture is too thick. Check the user manual for your specific model to see the maximum fill line. Also, ensure that your base doesn’t have large lumps of solid ingredients that could block the dasher’s path. Always follow the manufacturer’s speed recommendations—using a higher speed than “stir” or “speed 1” can put unnecessary strain on your mixer’s motor.
Ultimately, learning how to use the KitchenAid ice cream maker is about consistency and patience. It is a wonderful way to bring family and friends together for a delicious activity. As you get more comfortable, you can start experimenting with dairy-free options like coconut milk bases or refreshing sorbets. Enjoy the process, experiment with your favorite flavors, and don’t forget to keep that bowl in the freezer so you are always ready for your next batch!
Frequently Asked Questions
How long should I freeze the bowl before use?
You must freeze the bowl for at least 24 hours at the coldest setting available in your freezer. If you can hear any liquid sloshing inside when you shake the bowl, it is not frozen enough to use.
Why is my ice cream not getting firm?
This is usually caused by the freezer bowl not being cold enough or the base mixture being at room temperature when poured in. Always pre-chill your liquid base in the refrigerator for several hours before you begin churning.
Can I wash the freezer bowl in the dishwasher?
No, you should never place the freezer bowl in the dishwasher. The high heat can damage the cooling gel inside, and it should always be washed by hand with warm, soapy water after it has reached room temperature.
What is the correct speed for the mixer?
Always set your KitchenAid stand mixer to the lowest speed setting when using the ice cream attachment. Higher speeds can force the mixture to churn incorrectly or put unnecessary stress on the mixer motor.
When should I add mix-ins like nuts or cookies?
You should add any solid mix-ins during the final two minutes of the churning process. This ensures they are evenly distributed without getting crushed or sinking to the bottom of the bowl.
Why did my ice cream turn out icy?
An icy texture is typically caused by a slow freezing process or a base with too much water content. To prevent this, ensure your base is very cold before starting and consider using a recipe with enough fat and sugar to maintain a smooth, creamy structure.