
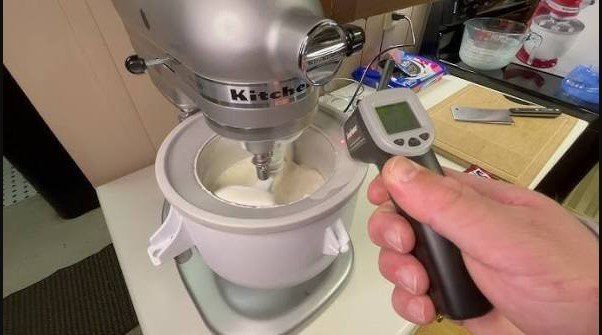
To ensure your ice cream turns out perfectly thick and creamy, you must freeze your KitchenAid ice cream bowl for at least 24 hours. Proper preparation is the secret to preventing icy textures and ensuring your dessert churns correctly every single time.
There is nothing quite like the taste of homemade ice cream on a warm summer evening. In 2026, as more home chefs lean into high-quality kitchen gadgets, the KitchenAid ice cream bowl attachment has become a staple in many households. If you have recently added this powerful tool to your countertop collection, you might be eager to start churning. However, one of the most common mistakes beginners make involves the freezing process. If you are asking how long to freeze your KitchenAid ice cream bowl, you are already on the right track toward delicious success.
The bowl is not just a standard mixing container; it is a thermal powerhouse. It contains a special liquid coolant sealed within the walls. When you place it in the freezer, this liquid must reach a state of complete solidification to effectively turn your cream and sugar mixture into a silky dessert. If you rush this step, you will find yourself with a bowl of soup instead of a scoop of gelato. Let’s dive into the details to make sure your next batch is a masterpiece.
Key Takeaways
- The 24-Hour Rule: Always freeze your bowl for a full 24 hours to guarantee the internal coolant is completely solid.
- Temperature Matters: Set your freezer to its coldest setting, ideally 0 degrees Fahrenheit or lower, for the best results.
- The Shake Test: If you hear liquid sloshing inside the bowl, it is not frozen enough to start churning.
- Storage Strategy: Store the bowl in the back of the freezer where the temperature is most stable and coldest.
- Plastic Protection: Wrap the bowl in a plastic bag to prevent freezer burn and keep ice crystals from forming inside the coolant chamber.
- Prep Your Mix: Always chill your ice cream base in the refrigerator for at least two hours before churning for a smoother consistency.
Understanding the Mechanics of Your Cooling Bowl
To master the process, you first need to understand what is happening inside that heavy, double-walled bowl. The internal coolant is designed to absorb heat rapidly from your ice cream base. If the coolant is not frozen through, it cannot do its job properly. This is why learning how long to freeze your KitchenAid ice cream bowl is the most important lesson you will learn as a budding ice cream maker.
The Importance of Internal Temperature
Most home freezers operate at varying temperatures depending on how often the door is opened and where the item is placed. Ideally, your freezer should be at 0 degrees Fahrenheit or lower. If your freezer is hovering around 10 or 15 degrees, it might take much longer for the bowl to reach the necessary thermal state. Always check your freezer settings before you plan your dessert night.
What Happens When You Rush
If you only freeze the bowl for a few hours, the outer walls might feel cold to the touch, but the core will still be liquid. As soon as you pour in your room-temperature ice cream base, the heat will instantly thaw the bowl’s interior. The result is a failure to churn, leading to a messy, melted puddle rather than the soft-serve consistency you are hoping for.
The Golden Rule: How Long to Freeze Your KitchenAid Ice Cream Bowl
So, what is the definitive answer regarding how long to freeze your KitchenAid ice cream bowl? While the manual may suggest a shorter window, the consensus among experienced kitchen enthusiasts is 24 hours. While 15 to 18 hours might work in a commercial-grade deep freezer, your standard kitchen appliance needs that full day to ensure total saturation of the cooling agents.
Visual guide about How Long to Freeze Kitchenaid Ice Cream Bowl
Image source: i.ytimg.com
Why 24 Hours is the Magic Number
Giving the bowl 24 hours provides a safety buffer. It accounts for temperature fluctuations that occur when you open your freezer to grab a bag of frozen vegetables or an ice cube. By letting it sit for a full day, you ensure that the walls are completely solid, providing consistent cooling power for the entire 20 to 30 minutes it takes to churn a batch of ice cream.
The Foolproof Shake Test
Before you commit to making your ice cream base, perform the “Shake Test.” Carefully remove the bowl from the freezer and give it a gentle shake near your ear. If you hear any sloshing or liquid movement, it is not ready. If it feels solid and silent, you are ready to begin. This simple test is the best way to determine if you have met the required freeze time.
Optimizing Your Freezer Environment
Where you store your bowl in the freezer is just as important as how long you leave it in there. Your freezer is likely packed with various items, and this can actually work against you if the bowl is not positioned correctly. Following a few organizational tips can drastically improve your results.
The Back of the Freezer Advantage
Always place your KitchenAid ice cream bowl in the very back of the freezer. The temperature near the door fluctuates significantly every time you open it. By tucking the bowl into the deepest corner, you keep it away from room-temperature air. This is the most stable environment for achieving a rock-solid freeze.
Clearance and Airflow
Ensure that the bowl is not buried under bags of peas or boxes of pizza. While it needs to be cold, it also benefits from steady airflow if your freezer has a fan-forced cooling system. Placing it on a flat, empty surface in the back ensures that the cold air can circulate around the entire exterior of the bowl.
Preparing the Bowl for Storage
How you store the bowl when not in use can impact its longevity. Many users leave their bowl in the freezer permanently, but if you have limited space, you might need to take it out. If you do take it out, make sure it is completely dry before putting it back in for its next session.
Avoiding Freezer Burn
Freezer burn is not just for food; it can affect your equipment too. Wrap your clean, dry bowl in a large plastic bag or heavy-duty cling wrap before freezing. This prevents moisture from the air from settling onto the interior of the bowl, which could lead to ice buildup that hinders the churning mechanism.
Thorough Cleaning Before Freezing
Never put a bowl into the freezer if it has residue from a previous batch. Even a small amount of sugar or fat can freeze and interfere with the blade rotation. Always wash the bowl in warm, soapy water and dry it completely before returning it to the freezer. This ensures it is always ready to go for your next creative flavor experiment.
Pro Tips for Professional Results
Once you have mastered the freezing timing, there are other factors that influence the texture of your ice cream. Even with a perfectly frozen bowl, your method of preparation plays a huge role in the final outcome. Use these tips to elevate your homemade creations to the next level.
The Pre-Chill Method
Your ice cream base should never be warm when it hits the bowl. After you cook your custard or mix your ingredients, chill the mixture in your refrigerator for at least two to four hours. A cold base takes less effort for the bowl to solidify, resulting in a smoother texture with fewer ice crystals.
Speed Matters
When you are ready to churn, have everything prepared. Attach the bowl to your KitchenAid stand mixer, turn it to the “Stir” or lowest setting, and then pour your base in. Pouring the mixture into a moving bowl prevents it from freezing instantly against the walls, which can sometimes cause the dasher to get stuck.
Don’t Overfill
Resist the urge to make a massive batch in one go. The bowl has a specific capacity, and overfilling it prevents proper aeration. Most recipes suggest leaving about an inch of space at the top. This allows the ice cream to expand as it incorporates air, resulting in that light, airy texture we all love.
Conclusion
Knowing how long to freeze your KitchenAid ice cream bowl is the fundamental step in the journey of making world-class frozen desserts at home. By committing to that 24-hour window and choosing the coldest spot in your freezer, you are setting yourself up for success. Remember that consistency is key; the colder your bowl and your base, the better your final result will be.
With these tips in mind, you can stop worrying about technical failures and start focusing on your flavor combinations. Whether you are crafting a classic vanilla bean or an experimental salted caramel, your KitchenAid attachment is a reliable partner for years to come. Grab your ingredients, check your bowl, and enjoy the rewarding process of churning your very own gourmet ice cream.
Frequently Asked Questions
Can I leave my ice cream bowl in the freezer all the time?
Yes, keeping your bowl in the freezer at all times is highly recommended. This ensures it is always ready for use and saves you from having to plan your dessert 24 hours in advance.
What if I don’t have 24 hours to freeze the bowl?
If you don’t have 24 hours, the ice cream will likely be soft-serve consistency rather than firm, and the churning process may fail. It is better to wait the full day to ensure a perfect, scoopable result.
Can I put the bowl in the freezer if it is still wet?
You should always dry the bowl thoroughly before placing it in the freezer. Moisture on the bowl can turn into ice crystals, which might interfere with the movement of the dasher or the quality of your ice cream.
Does the setting of my freezer affect the bowl?
Yes, your freezer must be set to 0 degrees Fahrenheit or lower to get the coolant to the correct state. If your freezer is set to a warmer temperature, the bowl will never freeze effectively.
How do I know if the bowl is completely frozen?
Perform the shake test by listening for any liquid sounds when you move the bowl. If you hear sloshing, it needs more time; if it is completely silent and heavy, it is ready to use.
Will the bowl lose its effectiveness over time?
With proper care and by not exposing it to extreme heat or damage, the coolant inside should remain effective for many years. Always handle the bowl with care to prevent leaks or punctures.